
Week 9 local scoreboard
November 1, 2019
An Attitude of Gratitude
November 1, 2019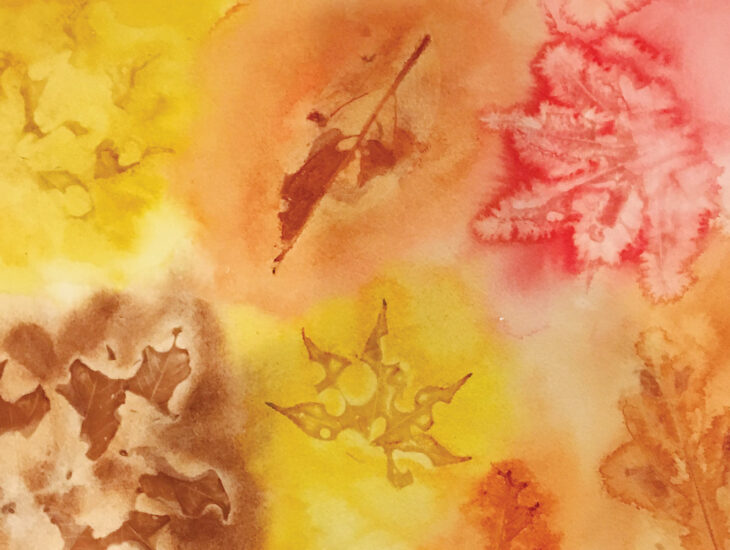
When we think of fall, we dream of the changing of the colors of the leaves the northern portion of our country experiences. With this project, we are able to replicate the beautiful colors often found in trees as their leaves change color and prepare for winter. While most trees turn shades of red, yellow and orange, as an artist you are welcome to use any colors you wish for this project.


WHAT YOU’LL NEED:
- Watercolors
- Heavy paper such as watercolor paper
- Paintbrushes
- Water
- Leaves
WHAT TO DO:
STEP 1
Using a clean paintbrush, spread some water around on your paper. Keep in mind, where you place the water is where the color is going to run. You can paint water all the way to the edges, or in patterns.
STEP 2
Add the color! Using your paintbrush, dampen the paint and add lots and lots of color to your paper. Go fast! If you take your time, the paint will dry.
STEP 3
While the paint is still very wet, lay the leaves down in your painting. There is no right or wrong way; leaves may overlap or even go off the page.
STEP 4
Once the paint is completely dried, remove the leaves to see your fall foliage masterpiece.
Tips:
• Use different leaves from different trees and plants.

• Regular paper will not work for this project. The water weights it down too much.
• Patience is key! The leaves must stay in the watercolor till it’s completely dry in order to capture all of their details. We let ours dry overnight.
• Once the leaves are placed on your paper, you can add more color between them. If a spot doesn’t look like it has enough color, add more paint!

• Leaves that are slightly limp and can lay flat work best. Fresh leaves fold up and dry leaves crumble.
• You cannot have too much paint! When you think you have enough on the paper, add more. Then add more again.
SPONSORED BY


